~ 2 min read
Vagrant networking to enable Internet accessible machine setup

If you’re using vagrant, like most devopsers out there, you might have also been on the road to run it on a local development machine and make it accessible through the Internet with some NAT rules on your modem or firewall. If you experienced this, and been struggling with getting vagrant networking to function right then we will look into a working setup for this purpose.
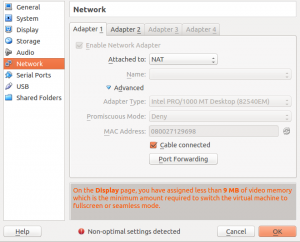
The case where networking issues could occur, is most probably if you have configured more than one interface for the virtual machine, like I did. I’ve got one interface using NAT and the other interface is using bridged networking as you can see in the Virtualbox UI and the vagrantfile snippet:
Vagrantfile configuration snippet for bridged networking:
- Assign this VM to a bridged network, allowing you to connect directly to a
- network using the host’s network device. This makes the VM appear as another
- physical device on your network.
config.vm.network :bridged, :bridge => 'p2p1'Setting up vagrant networking and routing properly
Because bridged networking provides an easy mechanism for virtual machines to exist side by side with your native OS and as part of your networked appliances seamlessly, this is by far the most convenient networking path to choose. Yet, vagrant doesn’t allow for bridged networking to use a static IP setup in it’s configuration but rather this is something that you’d have to take care of on your own.
I find the easiest solution for this is to assign another static IP address, which I know it isn’t part of my home DHCP server address range, and apply it on the bridged network interface. This can be easily done as follows:
# get static ip on bridged iface
ifconfig eth1:1 10.0.0.100 up
Then, to handle routing correctly, it is required to remove the default route to 10.0.2.2 which is the address space used by Virtualbox for NAT interfaces, and instead add a default gateway entry for the bridged interface:
#get routes setup correctly
route add default gw 10.0.0.138 eth1
route del default gw 10.0.2.2
Finally, an example for proper routing, or to examine your routing in general you can consult the following routing snippet:
root@precise32:~# route -n

Kernel IP routing table
Destination Gateway Genmask Flags Metric Ref Use Iface
0.0.0.0 10.0.0.138 0.0.0.0 UG 100 0 0 eth1
10.0.0.0 0.0.0.0 255.255.255.0 U 0 0 0 eth1
10.0.0.0 0.0.0.0 255.0.0.0 U 0 0 0 eth1
10.0.2.0 0.0.0.0 255.255.255.0 U 0 0 0 eth0

